This diy comes form www.itsoverflowing.com . So many projects you have planned for the new year and so little time to do them. Bust some paper, glue and glitter out and GET BUSY!
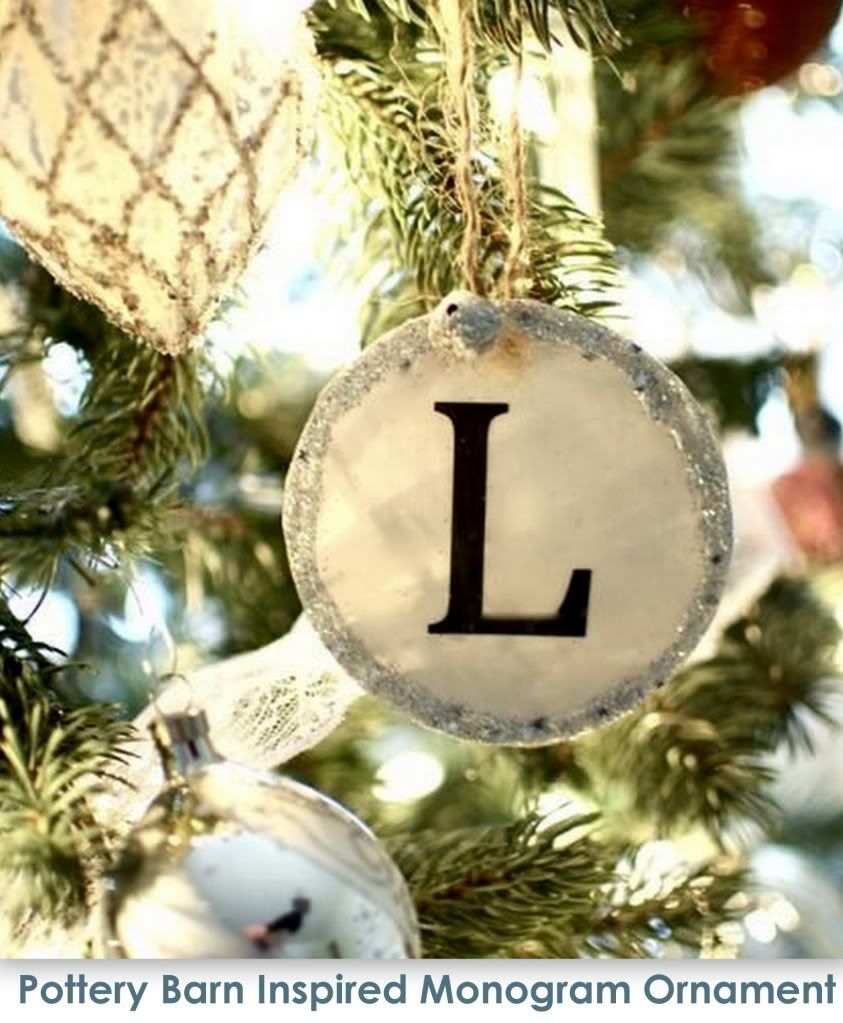 |
{My sweet mother-in-law and I had a wonderful time this weekend shopping {scouting ideas} from our favorite stores. Pottery Barn had this simple ornament and I'm a sucker for anything monogrammed!

The price was too much when you consider it would take little effort to be duplicated! Every crafter is different, but I'm not one to fill a shopping cart of goodies to make something that ends up costing more than if I'd bought it ready-made from the store. This craft has my stamp of approval for simplicity!

You'll need a sheet of cream or white card stock {whatever you have on hand}, a computer and a printer. As soon as I saw the template ornament, I knew the font I wanted to use! Have you seen that 'L' font before!?!? Recognize it!?! It's the font I use on my website for all the text. It's simple, but unique. It's called Skia and it works perfectly for imitating Pottery Barn's CAPS! Here it is so you don't have to add an extra step to your simple project! Skia Font. {I set my text size to 200 in my word document}.

Next I used a drinking cup and traced around the letter. I didn't want to purchase a punch from the craft store, but if you have one on hand feel free to use it. I personally take great pride in how great I am at cutting out circles! LOL! You'll want to cut two circles. One with your favorite initial and the other plain.
 |
Paint a coat of mod podge on the plain sheet of paper and lie the monogrammed circle on top of the plain circle so that your ornament is extra thick, but the initial is still visible. Use a bit of elmer's glue and line the rim of the circle.
 |
Cover the glue with glitter.
 |
Paint a SUPER thin coat of mod podge to the bell {careful not too much or the glue will reach the bell and you won't have a jingle anymore ~ been there, done that}. Sprinkle some glitter on the glue. Let it dry and recoat the bell with another thin coat of mod podge
 |
Once the glitter and glue have dried, paint a thin coat of mod podge over the entire ornament to minimize the spread of glitter {that pretty stuff sure is messy}!
 |
Let the ornament dry completely. Use a hole puncher {use a thin punch if you have one} at the top of the ornament to make one small hole. Separate a 8 inch piece of jute string so that you just have one string {keep it combined if your hole is a larger size).

String the bell with floral wire and place the wire through the jute string. Pull the jute string through so that both ends are even. Hold both strings together, wrap them around to make a loop at the end and tuck the end through the loop. Pull tight.
 |
Add your newest Potterybarn-ish ornament to your tree and step back to enjoy. Consider making one for each member of your family, to attach and hang from your stockings or attach them to gifts! It would take five minutes and some dry time to make a couple dozen of these! I love it when a craft has a good payoff both in time and money!
 |


No comments:
Post a Comment